Wednesday, December 29, 2010

Yesterday's Lunch and Workout

Yesterday we were in Stoney Creek (just east of Hamilton) and decided to try out an Italian place called "The Express".  It has a funny atmosphere where you feel you are sitting in a banquet hall instead of a restaurant.  Luckily for us (and the other patrons) there was no Karaoke going on during lunch hour.

I ordered a calzone and was shocked at the size of it since it was only $13.

 So I did my best to take out this crazy amount of food for lunch....
But I managed to add to my Hunk by putting most of it down.  Overall a good tasting meal but the location wasn't a cool kind of place to hang out in.

Eating all that good of course got Reno Chick started on us going for a monster walk up the stairs near our house.  Two days ago she got this idea and we ended up walking 6 kms and killing my legs so you know I wasn't excited looking up at the stairs again.

That is 500 stairs of sheer pain to the top but RC was nice and we only went up to the 1/2 way point and back down 2x so we wouldn't have to cross the road.  What a tough way to burn off all those calories that I had today!

Profile: Front Exterior-3 month Progress Update


I am going to profile our home a room (or space) at a time to give an idea of what it was like when we took possession, what we have accomplished in this first three months and what our future plans are.  Since we are financial types I will try to include information on what things cost.

I want to start with the front exterior and provide the story on how we chose our home. We looked at about 40 homes and back in August of this year we found the ONE. We saw it a second time with our agent the Friday before the Civic long weekend. We spent the long weekend at the Pillar and Post in Niagara Falls and after a lot of time discussing the house decided that we were going to put in an offer. The house needed a bit of work but had all the things that were on our must have list. We called up our agent and had a third visit on our way back from the long weekend trip. We told her we were ready to put in an offer, she said she didn't want to confuse us but she had one other home for us to see. As soon as we drove up to the house and opened the front door I said "we are in trouble" I knew I wanted this house.   

Our Front Door. The double doors and stained glass won us.
What did this house have going for it?

-Nice looking exterior with more character
-Taller ceilings and intricate crown molding on the main floor
-A fireplace with character
-Larger living room and dining room
-Bigger front and back yard
-More parking
-A main floor bathroom (a hard thing to find in older homes)
-Second floor laundry room
-Light filled master bedroom
-Beautiful staircase

-Proximity to the GO Train station was better
-We are steps away from the walking/biking path and the stairs that go up the mountain (free gym)
-We can walk to many bars and restaurants
-Just that feeling….


The negatives:

-Scary basement from hell that would probably leak all the time
-Even scarier basement stairs…my feet barely fit sideways
-A LOT of dirt, bad carpets, full of garbage
-Smells...many many bad smells


-Lots of traces of mouse poo in the house and raccoon poo on our upstairs deck
-Sketchy addition
-At least 300 more projects than house number ONE...which I like to think of as POTENTIAL

Our house was a Power of Sale and I can best describe the front exterior as Urban Jungle. I wish I had taken more before pictures but to be honest I was a little scared of what we had done to ourselves. Neither one of has much renovation experience and at the beginning I felt overwhelmed. RH will probably not believe this since I kept such a positive attitude but it was mostly a front. 


What our house looked like after taming the Urban Jungle but before new windows. Our poor porch is hidden just waiting to be noticed.
 
In the last 3 months this is what we have done to the Front Exterior:

-Removed bags and bags of weeds and cut down the shrubs (cost=free (except for the garden tools and brown bags...the garbage guys must hate us)
-Installed a new pendant light over the front door…having light is good, the previous light fixture did not work and our house was always the darkest one on the block (cost of pendant light $45 at Home Depot)
-Bought new front carpet (cost=$5, purchased on our Buffalo shopping trip)
-I wood filled several of the holes that are in our front door. The door is old but I really would like to keep it for now because it is quite beautiful. The bottom of the door needs to be trimmed slightly as it is very difficult to open and close. New paint job is also needed.
-We changed all of our windows which makes the house look much better. I really do not like the trim colour on the house (mint green) so the new windows bring a burst of white that is much needed. If this was our forever house I would have gone with a coloured window trim and capping but the extra cost ($1700) was more than we wanted to spend. With taxes and installation our windows cost $9,445. 

The new windows add a bit of brightness. On the downside you can see through them..we need window coverings on the asap.
Our future plans for the Front Exterior:

-Install a door knocker (it has been purchased for $5 from the ReStore...hint hint RH)
-Remove the cedar tree that blocks the view of our porch…I may even go crazy and chop down the other one too. RH likes the cedars but I do not. Replant with some nice shrubbery.
-Remove the rusted chain link fence from the left side of our house and replace with a wrought iron fence.
-Repave the side drive. This will involve a lot of prep work as the side drive is full of the neighbours rocks, some random bricks and lots of reno garbage.
-Shave down the front door slightly and sand and repaint the front door
-Repaint the porch floor...preferably with a non-slip product
-Purchase some outdoor seating (this will likely be second hand so some spray paint will be involved)
-New eaves trough
-Repair any rotted wood work on the house
-Paint all of the trim and woodwork on the house
-Fix the hole near our master bedroom which has attracted some wasps
-Remove the circular patio stones and bubbly curb things (during TIFF we went to see this movie "Conviction"…I was a bit embarrassed when RH said "look they have the same front patio stones as us"…this was during a scene where a murder had just occurred outside of a trailer at a trailer park…
-Possibly remove the concrete stairs and build a new set of stairs with railings
-The porch railings also need some fixing or possible replacement
-Install a new walkway and plant some boxwoods
-Add some seasonal planters

These stones will be gone!!
This colour keeps me up at night. Looking at the picture I am not sure why I have developed such a hatred towards it....it looks worse in person.
Part of our side driveway
Just some of the bricks that surround our home (there are many more piles)
 
There won't be much progress on these projects until the spring. We will be changing out our lead pipe and then will need to have the city come and replace their portion. None of the outside work will get started until that is done. Budget for all this…we hope to not spend more than $8,000 but have no idea how much the eaves trough work would be (does not include the cost of the lead pipe removal. 


Tuesday, December 28, 2010

Improved Blog

Not sure if anyone noticed the new banner for the blog at the top of the page but I think it is a big improvement.

I have to thank "Blissfully Domestic" for her help which is located on this page.

Hopefully everyone had an enjoyable few days with family and friends and now we can all look forward to starting a new year.  Things have been slow around the house for us over the last few days but I look to kick it into high gear for a couple days before heading to Pittsburgh for the New Year.

Friday, December 24, 2010

Farley Windows and Energy Performance Ratings

I figured I would put up some info on the windows that we had installed in our house.  The windows were manufactured by Farley and were installed by Home Depot.  We did check on Homestars and the reviews were not favorable so we will keep a close watch to make sure that we got a good deal.  Most of the problems I think would arise from improper installation as I would expect that HD would want things to go smoothly for them in terms of warranty calls.

On every new window you will have a NFRC sticker on it telling you a bunch of energy ratings.  Having never had to purchase new windows for a home before I had no clue what these ratings meant.  So here is the link to get some background info on all the ratings that could be listed on the sticker.  It appears that we purchased quite efficient windows with a low u factor (0.30) and a low solar heat gain coefficient (0.38).  Now if I can tackle the doors in the front and back of the house we might be able to afford heat this winter!

Hopefully this is a good reminder for me on the stats on our windows and also helps out someone else out there who didn't know what those ratings stood for.

Enjoy the holidays everyone.

Thursday, December 23, 2010

Day 2 of the installation of the new windows

The guys had to take off early to install a window for someone else.  That means that 3 windows will need to be completed on January 4th on the sides of the house.  But here are the pictures of the current state of the house and it looks great to me.

 The new windows really brighten up the front of the house and it will look even better when we change the rest of the colors to something with a little more pop to it.
 I wasn't sure if anyone could see RenoLab in yesterdays photos or the one above so I figured I would give you a closeup.
 The guys couldn't cap off the top window and said that they have to rent a ladder to get up that high to finish that work.
The windows on the side bay are done as crank-outs which should help us get some air flow into the house in the summer.
Here is the other side of the house with the unfinished windows that are installed and hopefully insulated.  One of them is the washroom window which we will have to frost or get to know our neighbors a lot better!

The only thing that I did today was to fix the kitchen door latch which was coming off from the wall.  Two new longer screws did the job and it works much better.

Wednesday, December 22, 2010

Day 1 of the installation of the new windows

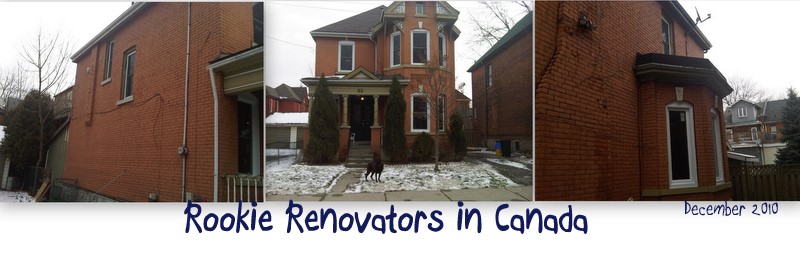
Today was the first day for the Home Depot installation team to install 14 new windows in our house.  The two guys working have been super tidy and so far things are looking good.  Well I can't wait till they finish tomorrow and things look done but already it looks better to me.

Here are the during pictures that I have in my phone.

 No window installed yet in the upper left window. 
 Looking out the bay window at the damage and waste so far.  Our neighbour wanted all of our windows that we were going to discard. 
 You can see RenoLab on the front lawn checking out the work and giving an approving nod towards the installation guys.

Tomorrow they will insulate and case out the windows so it will look like a much cleaner house when this is done.  Also we will have lower heating bills as the original windows and storms (circa 1895) were ready for a change!

I forgot to post the pictures of what I have been doing lately.  Well RC has left me with the kids this week so it has been tough to spend any real time on the closet.  I did change my first doorknob which I think looks a ton better than before but I will leave that for you to decide.


Isn't that a stylish door knob?!!  Ouch it just had to go and of course the one doorknob that we had purchased to replace it was from Restore and it wouldn't fit.  It had to be the only doorknob that couldn't be adjusted from 2 3/4" to 2 3/8" so after a trip to Lowe's this is what I ended up picking out for 3x the price.
At least it is something else that is done in the house.  Tomorrow we should be able to post pictures of the tree that should be back in its proper place post-window installation.

My Daily Commute

Choosing where to buy was a monstrous house hunt challenge for us. We ruled out Toronto due to the cost. I really wanted to live in Oakville. This is where I had lived for the past 10 years, my friends and family are there and I know where everything is. Then the idea of Hamilton came up, mostly due to the super cheap housing prices. The one mental obstacle to get over was the commute. I have always worked in Toronto and likely will continue to do so for the foreseeable future. We put a lot of time into the decision and came up with the conclusion that the commute would be manageable.

We live a few minute drive from the Hamilton Go Station where I take the 7:02am train in the morning and I am at my desk by 8:20am. On the way home I either take the 4:30pm train from Toronto (gets me at home by 5:50pm)or the 5:02pm train from Toronto (gets me at home by 6:20pm). It is not the best commuting situation but it is also not the worst. This type of commute would never work for me if I had to drive. After taking the GO Train for the past 13 years I like taking the train and the reliability of the train just can't be beat with any other mode of transportation. I usually either grab a nap, read, catch up on e-mails, do a Sudoku and before I know it I am at my destination. Some people extend their list of things to do on the train much beyond my scope to include personal grooming (makeup, hair combing, nail clipping) and eating…the GO Train offers an interesting culture that is entertaining to watch. The train is clean and comfortable all for a reasonable price which is tax deductible. The same group of regulars takes the train so for the social type it seems like a fun group to chat with. Being on the Lakeshore line is awesome since the train provides all day service. The other fantastic perk is in the morning the trains are waiting at the Hamilton Station so there is no need to wait on the platform for the train to pull up and I always get a seat. There is also the VIA train option which goes from Aldershot station to Toronto in about 34 minutes, definitely something I would like to try at some point and an awesome way to commute if you can afford the extra cost. If one had to take a cab from Toronto to Hamilton (which I have had to do on two occasions from work functions) that seems to run around $120.

Who knows how long this will remain our home base (we will touch on our long-term goals in future posts) but for now the Hamilton to Toronto commute is working out just as planned.

Tuesday, December 21, 2010

Dear Santa…my holiday DREAM list…


We moved into our home almost three months ago and with the number of projects we need to tackle money is VERY tight this year which means we will not be exchanging gifts (no fun)...so this list is just for fun:

1). Dyson canister vacuum…from all the dirt and sawdust that our house has produced our current vacuum is on its last legs. I have always owned a central vacuum but this would be too difficult to install in our Victorian home so I would like to give a Dyson vacuum a try.

2). A day at the spa…I have a permanently sore back and neck and my hands are in terrible shape from cleaning, carrying, fixing, gutting the house. A day of TLC and the ability to have girl hands again would be a nice change.

3). Photo Frames…lots of photo frames in all different colours and sizes..we have a lot of rooms to fill.

4). Iittala Kastehelmi Bowls. I am originally from Finland and have a number of the Iittala pieces. These bowls would make a great addition to my collection.


Pottery Barn Samantha Entry Way Collection
 5). Pottery Barn Samantha Entryway collection: I would love to pick up these two pieces and they would look fantastic in our foyer....but the price point is much higher than I can justify.  We have been trying to purchase this Grevback hat rack from Ikea as the cheaper alternative but it has not been in stock during the last few visits…they say there are a few somewhere in the store but they have been misfiled and can’t find them.

Ikea Grevback Hat Rack

6). A new pair of Yoga pants from Lululemon…mine did not make it through this latest week of renovation work

And this one is for Reno Hunk, he missed it on his wish list

7). The Big Green Egg: This brings me memories of the week we spent in Muskoka this past summer. RH used the Green Egg to cook every single meal…he even made a pizza on it…delicious.

8). Good wine...and lots of it:)

Friday, December 17, 2010

On to the next problem... fit wardrobe #2

Well I managed to get the wiring problem solved and cleaned up the area a bit so we should be able to get our 2nd wardrobe into place hopefully tonight.

As you can see in the top left of the picture there was a silly plug setup at the top of the old closet area.  I created those two holes in the drywall to figure out where the wire was going.  We have a junction box on the other side of the wall which has 5 sets of wires going into it, so I thought this wire ended there instead of at this plug.  Now the wire is out of the way so the wardrobe can move a bit closer to that wall but I bet I need 1-2 cm to make it fit. Instead of reinstalling a new longer wire I just removed the plug and troublesome wire.  Problem solved.

I didn't mention but I did get the rest of the baseboards and 1/4 round installed in the back rooms of the addition.  So now the dog and the kids will have rooms on the main level to play which should keep most of the brightly colored items in that area.

Also tonight we will get a tree for the living room area and we will have to get that decorated.  Can't wait to see what RenoChick will do to make us have the best tree setup in the neighborhood.  My little one is staying over tonight so I am sure she will want to help. 

On a sad note I didn't remember to buy my tickets to the NHL Alumni game in Pittsburgh at 10 am this morning so we probably won't be able to go which really sucks.  RC and me plan to spend a few days over New Year's celebrating in that other steel city.

Thursday, December 16, 2010

Time to zap our electrical problem

Today I turn my attention to the closet in the master bedroom.  We are planning on installing two Ikea Pax wardrobes into the former closet area and then making them look built in.


The wiring issue arises because the wires for a wall outlet go through this closet area and are making it impossible to put the wardrobe where we want it.  This will require me changing out the length of wire and making it a longer one so it doesn't interfere with our plans anymore.  I know that RenoChick really wants to get some closet space before the holidays are upon us.  Hopefully I can make that wish come true.


Here are the before pictures.


Why did they take the silly wire out through this hole on the left instead of following the path of the other two wires?  Well time for me to go see if I can make that a reality.

Monday, December 13, 2010

What a weekend... what's next?

Worked hard all weekend and I am sure that RenoChick will post pics of the floor in the master bedroom from start to finish.  Here are my pics which aren't great because they were taken with my phone.

 This is with only half of the sub-floor installed when we were still looking for the hardwood on Kijiji.  Only 3 more sheets of plywood to cut and screw down.

How it looks this morning....  the few pieces on top is all the leftover wood that we have.  Talk about cutting it close!

Overall, I think the floor looks great and today I will attempt to move stuff into the room so we can start to use it properly.  Right now there is still tape all over the floor which should stay down for a few more hours.  In the meantime I still have 1/4 round to install in the kids play room.  Outside it is snowy so I will set up my mitre saw in the basement instead of in the backyard.  No excuse for no progress with our reno!

One note on using a coping saw that I think will help me would be to purchase baseboards made out of wood instead of mdf.  I found that the mdf really chipped easily and made using a coping saw almost impossible (well impossible for me at least!).  For the master bedroom I have a lot of corners and I would really like everything to look just perfect so wood baseboards it is.  The cost will be worth it when the end result will look so much more professional.

The next big task will be for me to learn how to put down tiles which is for the back hallway.  That way the whole addition will have the floors changed and hopefully that improves the stability of that area of the house.  Right now I have 6 sheets of 1/2" plywood to use to improve the floors but the hallway might need 2 sheets.  What to do with the rest?  Something will have to get figured out as the plywood can't sit in the kitchen forever.

One day this week I think I will drive to the DeWalt store in Mississauga as I would love to find a table saw and a better mitre saw.  Hopefully a refurbished one won't cost too much and I could add it to my tool collection.  On the blog "What's Up Whimsy" they are doing a bunch of blogger wish lists.  So here are pics of my two items.


Friday, December 10, 2010

Sick Day!

Well RenoChick was feeling sick today so she stayed home today from work.  She was so sick that she decided to see if I knew how our new washer and dryer work by getting sick on the sheets.  Of course this was approx. 4:30 am but luckily the washer is only a few steps past the beer fridge so I knew where it was! Why are washers now so full of crazy options?  I set it to normal and well soiled and an hour later when I was getting another glass of water for her the thing sings a song because it was finished.  

So since she stayed home and slept all day then I figured it would be nice if I followed suit to give her moral support!  That being said we didn't get a lot done but we did manage a quick visit to Home Depot to get the flooring adhesive for the hardwood.  Tomorrow we will get a lot done.... I hope RC is better as well.

Wednesday, December 8, 2010

I dream of...sleeping in our master bedroom

Our Actual Master Bedroom
We just found some floors for the master bedroom so I thought I would post a picture of what the space looks like right now with the sub floors installed.

I also wanted to post pictures of where we have been sleeping since we moved in...the upstairs family room. This is a true bachelor pad as within 5-10 steps are the tv, computer, Rock Band equipment, bathroom and beer fridge. The bed is on the floor and never gets made and my clothes can be found in laundry buckets strategically placed all around the foot of the bed. Our future bathroom vanity,which is to the right of the bed, serves as some extra storage for the fancy stuff like my work clothes. Things can only go up from here...


Just Bought the Flooring for the Master Bedroom

So I found some flooring available on Kijiji and I got it for only $350.  If timing works out I will pick it up in a couple hours and get the wood acclimated to our house so I can install it sooner.  There is a big flooring auction this weekend but this way we know exactly what we have to work with to cover the floor.  Also it is a bit of a concern that there isn't enough of this flooring available but we found the same colour easily online so we can purchase more if we need to.  The only problem with that is the price is typically around $9 sq. ft. which is quite expensive.  Let's hope I can install it with no errors or it will cost me twice!

Tuesday, December 7, 2010

Fixing Squeaky Sub-Floors

So one of the back rooms has baseboards and 1/4" round installed.  Just need to caulk it and it should all look pretty good.

Today I moved up to the master bedroom which needs hardwood installed which means I am going to put down 1/2" of hardwood first.  Well this room was one where the old carpet smelled so bad with cat urine that I had to remove it the day we moved into the house.  Unfortunately for me it appears that there was enough liquid that over time that area became super squeaky.  So I put in a ton of screws to try to reduce the squeaking as much as possible and now with the 1/2" of plywood on top it appears that the squeaks are gone.

I like it when all it takes is a bit more time to get something done to the professional level that we all expect in our homes.  Time for me to get back to putting in more baseboard screws.

Monday, December 6, 2010

The Back Addition with Before and After Pictures

Kids Play Room Before with smelly carpet

Kid's Playroom with carpet ripped out....smelly couch still in
Some of the Tools used

Kid's Playroom In Progress-Bamboo Floors half in...before crisis
The Dog's Room Before

The Dog's Room-with the beautiful bamboo floors

We have a small addition at the back of our house with two rooms. Our plan was to not get too carried away with spending a lot of money or time on these two rooms. The addition is frankly not that well built and will need some fix ups next year. It does provide a nice amount of extra space; the larger of the two rooms will be the kid's playroom and the smaller room will be our dog's room (dog's have a lot of stuff too). 

RenoHunk had never installed flooring before but he did a great job at learning and the floors look and feel great. He started with the kids playroom as we were lucky enough to get some free Bamboo flooring from his parents. This is where we learned an important lesson...there is no such thing as free. One of the pictures above shows the half way point of the flooring in the kids room...it was precisely at this point that all the other boxes of flooring that we opened up were a different colour. This is another lesson when installing hardwood flooring, open and inspect all hardwood flooring boxes before installing. We spent a few days contemplating what we should do. Since the flooring was from an auction it was not boxed in the manufacturer's box and it is virtually impossible to match flooring between different brands. We made the decision to do the other half of the room with the lighter shade of flooring...this is the kids playroom after all and after we put down an area rug the difference won't be as noticeable.  For the dog's room we were able to pick up some bamboo flooring at the Hamilton Restore for about $100 and I am very happy with the results.

These are the two rooms where RenoHunk has been working on installing the baseboards which is another first for him. Hopefully these two rooms will be fully done within the next few days and we can enjoy the extra space that is so badly needed right now.

Only thing to declare is the kitchen sink!

So we got to do some shopping this weekend after watching the Sabres shut out the Blue Jackets in a sleeper of a game.  The total spend for the items this weekend was $850 and included a kitchen sink and new faucet.  Lucky for us we found some of my old poker funds (in US dollars) kicking around to pay for most of the purchases.  The other lucky thing was that we were never asked how much alcohol we had in the car as we were only allowed 4 bottles of wine.  Instead we had a case of wine to get us to the holidays (or was that through the holidays?).

Time for me to get back to those baseboards.  Got the coping saw and some 1/4" round so hopefully I can get this done today.

Friday, December 3, 2010

We are off to Buffalo today...

I am just getting ready to leave work and then we are off to Buffalo to watch a hockey game. In Toronto the weather is great right now but apparently Buffalo has been hit with quite a bit of snow....this may be a bad idea. Feeling a bit guilty about putting the reno's on hold for the weekend because we have so many projects on the go right now and the house is a HUGE mess. We do plan on devoting some time to shopping for the house so that should result in a few checkmarks on our to do list.

Thursday, December 2, 2010

Baseboards

Okay so I thought that putting in baseboards was going to be easy.  First cut ... too short = ugly gap in corner.  No problem it is only the dog's room so put in a small piece to fill it in and it can be covered by some glue and silicon.  Next problem was finding out that one shouldn't mitre both cuts on an inside corner.  I guess room 2 (the kids room) will get this treatment but the dog's room will be poor DIY rookie reno form!

So now I need a coping saw.  Just watched about 10 videos on how to do this correctly so hopefully I can get it right in at least one corner.

Sad day as a rookie reno guy... Renochick is going to be so disappointed.  Just to top things off I now get to get ready to go to the dentist.

The leak on the sink was fixed by putting in a new assembly onto the faucet but it seems quite tight.   Hopefully I can figure out how to fix that while looking up how to make our shower faucet stay connected to the wall.

Renos just have to get done a day at a time and one small job at a time.  So much time and so little progress.  Grrr.

Tuesday, November 30, 2010

Hamilton: Weird Stuff

Now Hamilton has some really nice homes but this one would be a pain to live close to!  I couldn't get the statue by the street which Reno Chick thought was some garbage but you can just imagine.  I can't wait for this house to really get into the Xmas spirit and fancy up the front yard a bit more.  I will come back with another picture if I get a chance to swing by and look at the place.

Okay now I will get back to work .... have to find that grout cleaner first.

Plumbing

Let's just say that I don't know the first thing about plumbing.  I do know that you turn on a faucet and water comes out but that is about it!  So today I will attempt to fix the upstairs washroom vanity which has a leak on the cold water side.

You will notice in the picture that there is a bottle of vinegar there which was recommended to help get off the bonnet nut.  So while I wait for the next time for me to apply more vinegar I will begin on cleaning grout in the same bathroom.  One shower and bathtub to go still!
Related Posts Plugin for WordPress, Blogger...